jeudi 25 mai 2017

Fluentd and Graylog2 for End-to-End Log Analysis

This article shows how to set up Fluentd with Graylog2. Graylog2 is a popular log analysis framework powered by Elasticsearch and MongoDB. Fluentd can output data to Graylog2 in the GELF format to take advantage of Graylog2's analytics and visualization features.

Prerequisites

  • A basic understanding of Fluentd
  • Ubuntu/Debian Linux
  • sudo/root access

Setup

Dependencies

Install the dependencies with the following command.
sudo apt-get update
sudo apt-get install mongodb-server openjdk-7-jre-headless uuid-runtime adduser --yes

Elasticsearch

Latest Graylog2 requires Elasticsearch 1.7 or later, which can be installed with the following commands.
NOTE: Graylog2 doesn't support Elasticsearch 2.0 yet.
wget https://download.elasticsearch.org/elasticsearch/elasticsearch/elasticsearch-1.7.1.deb
dpkg -i elasticsearch-1.7.1.deb
Then, open /etc/elasticsearch/elasticsearch.yml, find the line that says
cluster.name: elasticsearch
Uncomment and update it to cluster.name: graylog2.
Also, for better security, disable dynamic scripting for Elasticsearch by adding the following line to /etc/elasticsearch/elastcisearch.yml.
script.disable_dynamic: true
Elasticsearch is ready. Start it with
sudo /etc/init.d/elasticsearch restart

Graylog2

In this article, we use Graylog2 1.2.
Get the GPG key.
wget -qO - https://raw.githubusercontent.com/Graylog2/graylog2-puppet/master/files/RPM-GPG-KEY-graylog2 | apt-key add -
Update the package list.
echo 'deb http://packages.graylog2.org/repo/debian/ trusty 1.2' > /etc/apt/sources.list.d/graylog2.list
Finally, install Graylog's components.
sudo apt-get update
sudo apt-get install graylog-server graylog-web graylog2-stream-dashboard --yes
Edit /etc/default/graylog-server and /etc/default/graylog-web and update RUN=no to RUN=yes.
Edit /etc/graylog/server/server.conf and cocnfigure the following parameters:
  • password_secret
  • root_password_sha2
For root_password_sha2, run echo -n YOUR_PASSWORD | shasum -a 256 and copy and paste the output string. This "YOUR_PASSWORD" will be used later to log into Graylog2's web interface.
Edit /etc/graylog/web/web.conf and configure the following parameters:
Finally, start Graylog2!
sudo /etc/init.d/graylog-server restart
sudo /etc/init.d/graylog-web restart

Nginx (Optional)

If you are sharing access to Graylog2's web interface outside of your network, You need to set up a proxy server. Nginx is recommended.
First, install Nginx.
sudo apt-get install nginx --yes
Edit /etc/nginx/sites-available/default so that it looks exactly like this:
server {
  listen 80;
  location / {
    proxy_pass http://localhost:9000/;
    proxy_set_header Host $host;
    proxy_set_header X-Real-IP $remote_addr;
    proxy_set_header X-Forwarded-For $proxy_add_x_forwarded_for;
    proxy_connect_timeout 150;
    proxy_send_timeout 100;
    proxy_read_timeout 100;
    proxy_buffers 4 32k;
    client_max_body_size 8m;
    client_body_buffer_size 128k;
  }
}
Then, restart nginx.
sudo /etc/init.d/nginx restart

Graylog2 GELF input

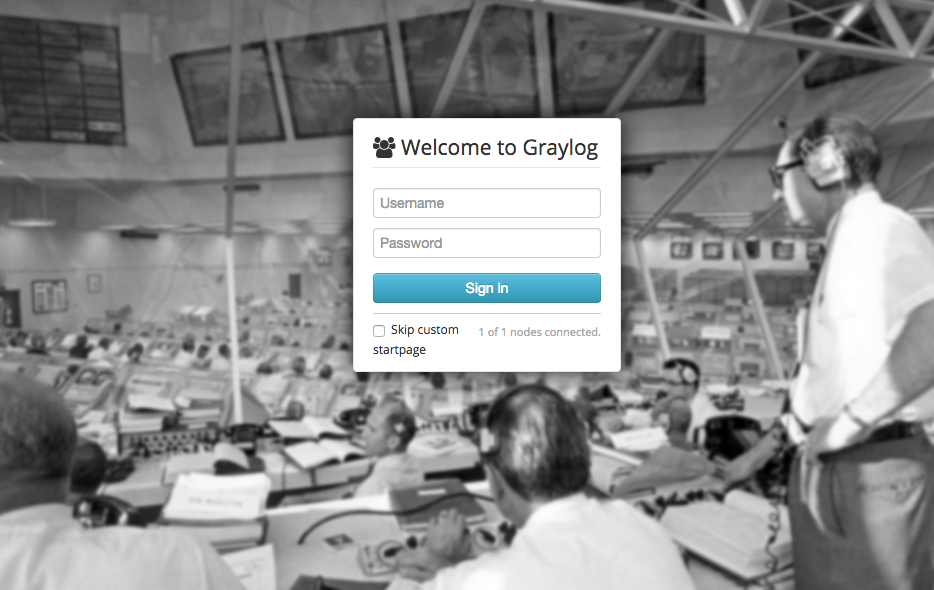
Go to . If Nginx was configured in the previous section, it should be served from port 80. Otherwise, it should be at port 9000.
To log in, use "admin" as the username and "YOUR_PASSWORD" from the Graylog2 server setup as your password.
Once logged in, click on "System" in the top nav. Next, click on "Inputs" from the left nav. (Or, you can just go to <YOUR_ GRAYLOG2 URL>/system/inputs).
Then, from the dropdown, choose "GELF UDP" and click on "Launch new input", which should pop up a modal dialogue, Since the default values are good, fill the "Title" and just click "Launch".
Now, Graylog2 is ready to accept messages from Fluentd over UDP. It's time to configure Fluentd.

Fluentd

See here for all the download options. Here, we are using the Trusty deb package.
curl -L http://toolbelt.treasuredata.com/sh/install-ubuntu-trusty-td-agent2.sh | sh
Then, install the out_gelf plugin to send data to Graylog2. Currently, the GELF plugin is not published to Rubygems, so we download the plugin file and place it in /etc/td-agent/plugin. We also need to gem-install GELF's Ruby client.
/usr/sbin/td-agent-gem install gelf
cd /etc/td-agent/plugin
sudo wget https://raw.githubusercontent.com/emsearcy/fluent-plugin-gelf/master/lib/fluent/plugin/out_gelf.rb
Finally, edit /etc/td-agent/td-agent.conf as follows.
<source>
  type syslog
  tag graylog2
</source>
<source>
  type tail
  format nginx
  path /var/log/nginx/access.log
  tag graylog2.nginx
</source>
<match graylog2.**>
  type copy
  <store>
    type gelf
    host 0.0.0.0
    port 12201
    flush_interval 5s
  </store>
  <store>
    type stdout
  </store>
</match>
That configuration listens to two data sources:
  1. Nginx access log of Graylog2 web app itself. Admittedly, this is a toy example, but it showcases the in_tail plugin.
  2. It listens to syslog input. Fluentd automatically parses common fields such as ident.
We need to make a couple of tweaks to successfully ingest Nginx access logs and syslogs.
  1. Run sudo chown -R td-agent:td-agent /var/log/nginx so that Fluentd can read Nginx access logs.
  2. Open /etc/rsyslog.conf and add the following line to the beginning of the file: *.* @127.0.0.1:5140 Then, restart rsyslogd by running sudo /etc/init.d/rsyslog restart.
Finally, start Fluentd with the following command.
sudo /etc/init.d/td-agent restart

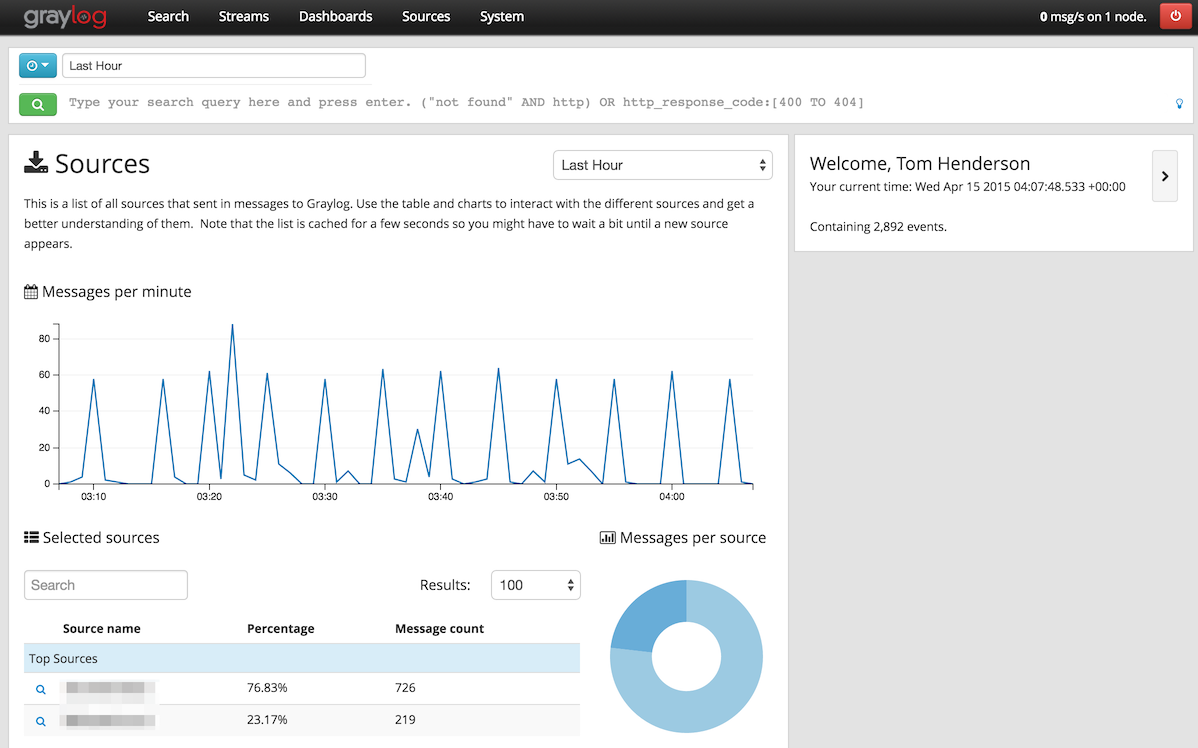
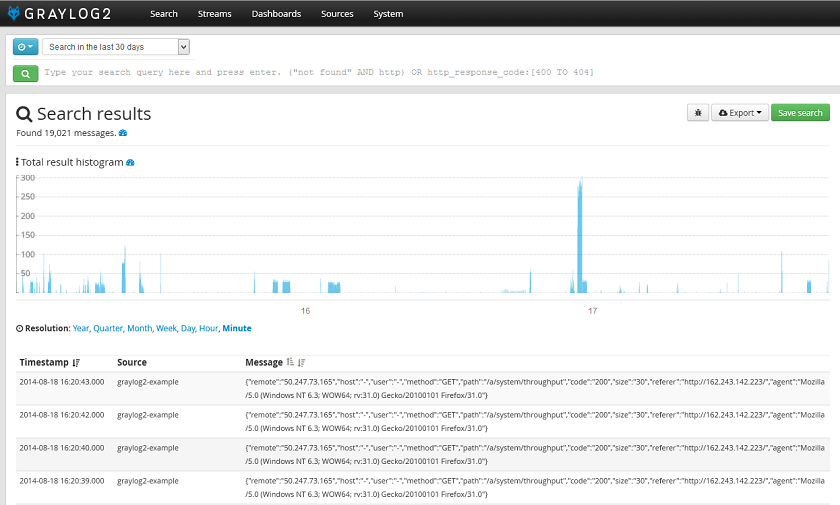
Confirming the setup inside Graylog2's UI

When you log back into Graylog2, you should be seeing a graph like this (wait for events to flow in)

What's Next?

Interested in other data sources and output destinations? Check out the following resources:

How to Install and Configure Graylog Server on Ubuntu 16.04


How to Install and Configure
Graylog Server on Ubuntu 16.04


Graylog is a free and open source powerful centralized log management tool based on Elasticsearch and MongoDB. Graylog helps you to collect and analyze your system logs to debug applications.
Graylog is made up of three components Elasticsearch, MongoDB and Graylog server. Elasticsearch is used to store the log messages and provide searching facilities. MongoDB isused to store the configuration and meta information. Graylog server collects the logs from various inputs and provides a web interface for managing the logs.
In this tutorial, we will explain how to install and configure Graylog server on Ubuntu 16.04.

Prerequisites

  • A server running Ubuntu 16.04.
  • A non-root user with sudo privileges setup on your server.
  • A static IP address 192.168.15.110 configure on your server.
##Update the System
First, update your system to the latest stable version by running the following command:
sudo apt-get update -y sudo apt-get upgrade -y
Once your system is up to date, you can proceed to the next step.

Installing Elasticsearch

Elasticsearch is one of the main components of Graylog server. Elasticsearch stores all the logs sent by Graylog server and displays the messages over the built-in web interface.
Before starting, Elasticsearch requires Java to be installed on your server. So you will need to install Java first.
By default Java is not available in Ubuntu default repository. So first add the Oracle Java PPA to apt with the following command:
sudo add-apt-repository ppa:webupd8team/java
Next, update your apt package database with the following command:
sudo apt-get update -y
Next, Install the latest stable version of Oracle Java 8 with the following command:
sudo apt-get install oracle-java8-installer
Next, Verify the Java version by running the following command:
java -version
Output:
java version "1.8.0_91"
Java(TM) SE Runtime Environment (build 1.8.0_91-b14)
Java HotSpot(TM) 64-Bit Server VM (build 25.91-b14, mixed mode)
Before installing Elasticsearch, you will need to download and install a GPG signing key.
sudo wget -qO - https://packages.elastic.co/GPG-KEY-elasticsearch | sudo apt-key add -
Next, configure Eleasticsearch repository with the following command:
sudo echo "deb https://packages.elastic.co/elasticsearch/2.x/debian stable main" | sudo tee -a /etc/apt/sources.list.d/elasticsearch.list
Next, update the repository database with the following command:
sudo apt-get update -y
Then, install elasticsearch with the following command:
sudo apt-get install elasticsearch -y
Start the elasticsearch service and enable it to start on boot time with the following command:
sudo systemctl start elasticsearch sudo systemctl enable elasticsearch
Next, you will need to make some changes in elasticsearch.yml file:
sudo nano /etc/elasticsearch/elasticsearch.yml
Change the file as shown below:
cluster.name: graylog
network.bind_host: localhost
script.disable_dynamic: true
Save the file and restart the Elasticsearch service:
sudo service elasticsearch restart
Next, verify Elasticsearch is running properly or not with the following command:
curl -XGET 'http://localhost:9200/_cluster/health?pretty=true'
If everything is ok, you should see the following output:
{
  "cluster_name" : "graylog",
  "status" : "green",
  "timed_out" : false,
  "number_of_nodes" : 1,
  "number_of_data_nodes" : 1,
  "active_primary_shards" : 0,
  "active_shards" : 0,
  "relocating_shards" : 0,
  "initializing_shards" : 0,
  "unassigned_shards" : 0,
  "delayed_unassigned_shards" : 0,
  "number_of_pending_tasks" : 0,
  "number_of_in_flight_fetch" : 0,
  "task_max_waiting_in_queue_millis" : 0,
  "active_shards_percent_as_number" : 100.0
}
Once you are done, you can proceed to the next step.

Installing MongoDB

First, you will need to import the MongoDB public GPG key into apt.
sudo apt-key adv --keyserver hkp://keyserver.ubuntu.com:80 --recv EA312927
Next, create the MongoDB source list file with the following command:
sudo echo 'deb http://downloads-distro.mongodb.org/repo/debian-sysvinit dist 10gen' | sudo tee /etc/apt/sources.list.d/mongodb.list
Update your apt database and install MongoDB with the following command:
sudo apt-get update -y sudo apt-get install mongodb-org
Next, start the MongoDB service and enable it to start on boot:
sudo systemctl start mongod sudo systemctl enable mongod

Installing Graylog

First, you will need to download and install graylog repository on your system.
You can do this by using wget command:
============> La version 2.2 de Graylog existe
wget https://packages.graylog2.org/repo/packages/graylog-2.0-repository_latest.deb
Next, install graylog repository with the following command:
sudo dpkg -i graylog-2.0-repository_latest.deb
Next, Install https support and update the repository cache with the following commands:
sudo apt-get install apt-transport-https -y sudo apt-get update -y
Finally install Graylog server with the following command:
sudo apt-get install -y graylog-server
Next, you will need to install pwgen to generate password secret keys for graylog server.
sudo apt-get install pwgen
Next, generate a secret key using pwgen command:
pwgen -N 1 -s 96
You should see the following output:
eK76Gx7mwdQGIVYzOm7GYmucqiGShvZQ96vIQFyf0PHEi0bTFSQemte2ADkMZllv0epvpeSGqiInvnnXxxxRpQyYLKCyvL8v
Next, set a hash password for the root user that can be used to to login into the web interface.
===> ne marche pas avec les caractères type $$$$
echo -n password | sha256sum
You should see the following output:
5e884898da28047151d0e56f8dc6292773603d0d6aabbdd62a11ef721d1542d8  -
Next, you will need to edit the server.conf file to begin the graylog configuration.
sudo nano /etc/graylog/server/server.conf
Change the file as shown below:
root_timezone = Pacific/Tahiti
password_secret =
root_password_sha2 = 
root_email = hitjethva@gmail.com
root_timezone = UTC
elasticsearch_discovery_zen_ping_unicast_hosts = 192.168.15.110:9300
is_master = true
elasticsearch_max_docs_per_index = 20000000
elasticsearch_max_number_of_indices = 20
elasticsearch_shards = 1
elasticsearch_replicas = 0
Save and close the file when you are finish.

Installing the Graylog Web Interface

You can configure Graylog web interface by editing server.conf file.
sudo nano /etc/graylog/server/server.conf
Change the following lines:
rest_listen_uri = http://192.168.15.110:12900/
web_listen_uri = http://192.168.15.110:9000/
Once you are done, restart the Graylog service with the following command:
sudo systemctl daemon-reload sudo systemctl restart graylog-server

Accessing the Graylog Web Interface

Once everything is up to date, it's time to access graylog web interface.
Open your favourite web browser and type the URL http://192.168.15.110:9000. Login with username admin and the password you configured at root_password_sha2 on server.conf.
You should see the following pages:

Conclusion

Congratulations! you have successfully installed and configured graylog server on Ubuntu 16.04. You can now easily explore the other functionality that it offers.

Setting up a Graylog Log Management Server WITH VIRTUALBOX ova


Installing the Graylog Server

Graylog is a free log management platform that can collect log data from a wide range of sources. This post shows how to quickly set up a Graylog server and start monitoring logs from Linux and Windows hosts. For detailed documentation refer to the Greylog Online Documentation.
The quickest way to get started is to download the Graylog OVA Appliance. This is imported into a new VM in your VMware environment.
Once the appliance is up and running, log in to the console with username and password ubuntu. We’re going to update the admin password, email config and timezone:
sudo graylog-ctl set-admin-password <password>
sudo graylog-ctl set-email-config <smtp server> --user=<username> --password=<password>
sudo graylog-ctl set-timezone <zone acronym>
sudo dpkg-reconfigure tzdata
We’ll also assign a static IP by editing /etc/network/interfaces, and then reload the network and Graylog service:
sudo ifdown eth0 && sudo ifup eth0
sudo graylog-ctl reconfigure
Finally, change the password for the ubuntu user on the VM with passwd and log off.
You can now access the server on the IP address we set above and log in with username admin and the password you set earlier. You may want to add a DNS record for the new server at this point.
Graylog Login Screen

Configure Inputs

Before we start sending log data to Graylog, we need to tell it what type of data we’ll be sending. We do this by creatign two inputs: a Syslog UDP input for our Linux servers and a GELF UDP input for our Windows servers.
Click on System > Inputs, and select GELF UDP from the input menu. Click Launch new input. Turn on ‘Global input’, and give the input a name. All other settings can be left as their defaults. Repeat these steps to create another input, this time using the Syslog UDP type.

Set up Clients

Linux

On our linux clients we’ll configure rsyslog to forward log data to Graylog. Save the following config to /etc/rsyslog.d/90-graylog2.conf, replacing syslog.example.com with the IP address or DNS name of the Graylog server:
$template GRAYLOGRFC5424,"%protocol-version% %timestamp:::date-rfc3339% %HOSTNAME% %app-name% %procid% %msg%\n"
*.* @syslog.example.com:514;GRAYLOGRFC5424
view raw90-graylog2.conf hosted with ❤ by GitHub
And restart rsyslog:
sudo service rsyslog restart

Windows

On our Windows clients we need to install NX Log Community Edition to export log data.
Once it’s intalled, open up C:\Program Files (x86)\nxlog\conf\nxlog.confand enter the following, replacing syslog.example.com with the IP address or DNS name of the Graylog server:
## This is a sample configuration file. See the nxlog reference manual about the
## configuration options. It should be installed locally and is also available
## online at http://nxlog.org/nxlog-docs/en/nxlog-reference-manual.html
## Please set the ROOT to the folder your nxlog was installed into,
## otherwise it will not start.
#define ROOT C:\Program Files\nxlog
define ROOT C:\Program Files (x86)\nxlog
Moduledir %ROOT%\modules
CacheDir %ROOT%\data
Pidfile %ROOT%\data\nxlog.pid
SpoolDir %ROOT%\data
LogFile %ROOT%\data\nxlog.log
<Extension gelf>
Module xm_gelf
</Extension>
<Input in>
# Use 'im_mseventlog' for Windows XP and 2003
Module im_msvistalog
Exec if ($EventID == 4202 or $EventID == 4208 or $EventID == 4302 or $EventID == 4304 or $EventID == 5004) drop();\
else{\
if ( $EventType == "INFO" ) $SyslogSeverityValue = 6;\
if ( $EventType == "WARNING" ) $SyslogSeverityValue = 4;\
if ( $EventType == "ERROR" ) $SyslogSeverityValue = 3;\
}
</Input>
<Output out>
Module om_udp
Host syslog.example.com
Port 12201
OutputType GELF
</Output>
<Route 1>
Path in => out
</Route>
view rawnxlog.conf hosted with ❤ by GitHub
To apply the new config, reload the nxlog service.

Viewing Logs

You should now be able to log in to your Graylog server and see log data coming in under the Sources tab.


Graylog Log Sources
Graylog Log Sources