Installing the Graylog Server
Graylog is a free log management platform that can collect log data from a wide range of sources. This post shows how to quickly set up a Graylog server and start monitoring logs from Linux and Windows hosts. For detailed documentation refer to the Greylog Online Documentation.
The quickest way to get started is to download the Graylog OVA Appliance. This is imported into a new VM in your VMware environment.
Once the appliance is up and running, log in to the console with username and password
ubuntu. We’re going to update the admin password, email config and timezone:sudo graylog-ctl set-admin-password <password>
sudo graylog-ctl set-email-config <smtp server> --user=<username> --password=<password>
sudo graylog-ctl set-timezone <zone acronym>
sudo dpkg-reconfigure tzdata
We’ll also assign a static IP by editing
/etc/network/interfaces, and then reload the network and Graylog service:sudo ifdown eth0 && sudo ifup eth0
sudo graylog-ctl reconfigure
Finally, change the password for the
ubuntu user on the VM with passwd and log off.
You can now access the server on the IP address we set above and log in with username
admin and the password you set earlier. You may want to add a DNS record for the new server at this point.
Configure Inputs
Before we start sending log data to Graylog, we need to tell it what type of data we’ll be sending. We do this by creatign two inputs: a
Syslog UDP input for our Linux servers and a GELF UDP input for our Windows servers.
Click on System > Inputs, and select
GELF UDP from the input menu. Click Launch new input. Turn on ‘Global input’, and give the input a name. All other settings can be left as their defaults. Repeat these steps to create another input, this time using the Syslog UDP type.Set up Clients
Linux
On our linux clients we’ll configure rsyslog to forward log data to Graylog. Save the following config to
/etc/rsyslog.d/90-graylog2.conf, replacing syslog.example.com with the IP address or DNS name of the Graylog server:
And restart rsyslog:
sudo service rsyslog restartWindows
On our Windows clients we need to install NX Log Community Edition to export log data.
Once it’s intalled, open up
C:\Program Files (x86)\nxlog\conf\nxlog.confand enter the following, replacing syslog.example.com with the IP address or DNS name of the Graylog server:
To apply the new config, reload the nxlog service.
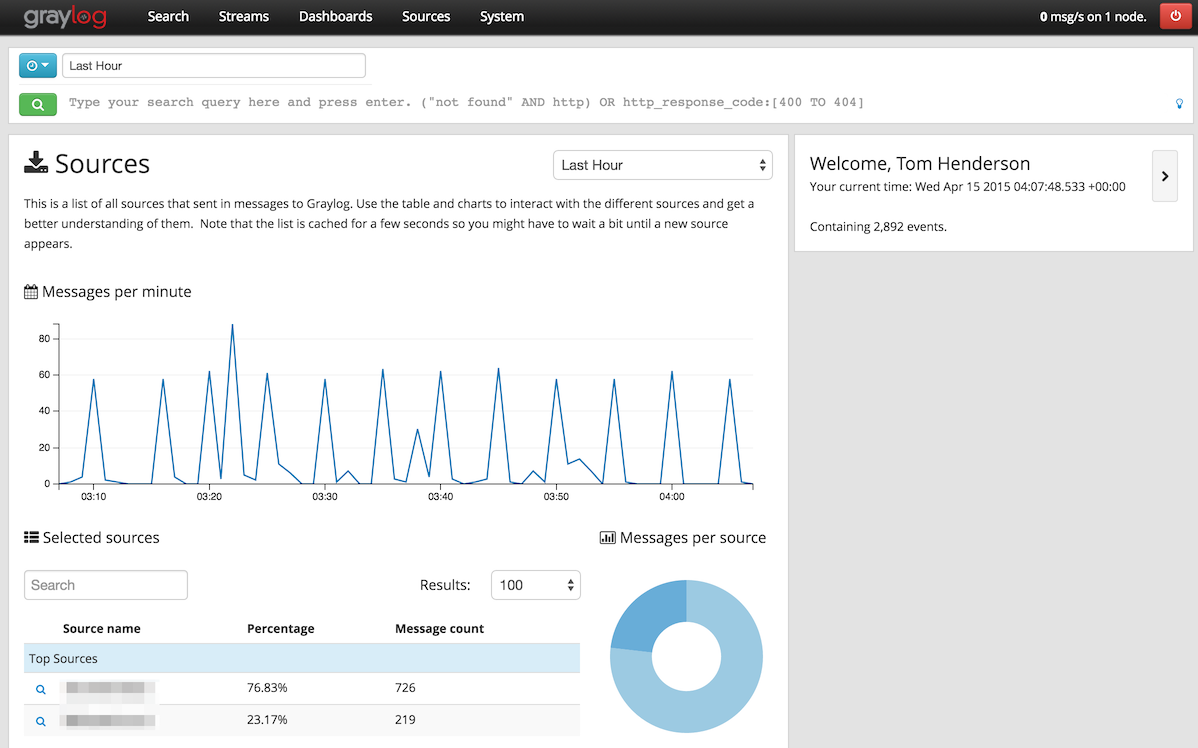
Viewing Logs
You should now be able to log in to your Graylog server and see log data coming in under the Sources tab.
Aucun commentaire:
Enregistrer un commentaire